Thanksgiving Day is on the horizon, and while it’s a cherished time to spend with family and friends (and food!), it’s also an opportunity to learn! Not just about the history or the meaning of Thanksgiving, but about…well, anything! Which brings us to Today’s Lesson… Thanksgiving-related STEAM and STEM activities for kids and tweens!
Let’s jump right in!
How to Make Homemade Butter
Science experiments are fun. Science experiments you can actually eat? The BEST! Not only will younger kids love learning how to make butter at home, but they’ll be thrilled when you set it out on the Thanksgiving dinner table. Imagine the pride on your child’s face when he or she sees Grandma spreading their homemade butter on a roll or on some corn. They can yell, “I made that!” and tell the story of how at the table!

Is making butter difficult? Not really. Butter is made from cream, which is essentially milk with high fat content. Once the cream is agitated by churning or shaking, the fat joins together into a blob as it separates from the liquid. The blob? Butter! The liquid? Buttermilk!
What You’ll Need
This is about as easy as it gets:
- Heavy cream
- Mason jar with a lid
- Small strainer or colander
- Small bowl or container
Steps
- Fill the jar halfway with the heavy cream.
- Place the lid on (make sure it’s tight!).
- Shake the jar.
- Shake some more.
- Shake.
- What, are you tired? Keep shaking!
As you’re shaking, you can rest your arms for a minute to check on the blob’s progress. Once the butter blob stops getting larger, and the liquid is thin, you can stop shaking.
- Dump the contents of the jar into the strainer/colander, which you should hold over the bowl or container.
- Keep the butter in the bowl, and save the buttermilk in the bowl for later use. Just be sure to refrigerate both!
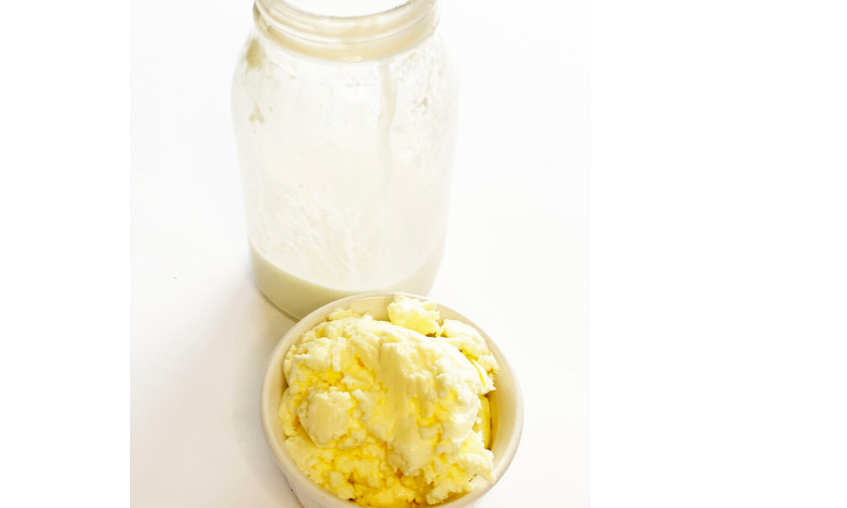
Does the butter taste the same as store-bought butter? It may be a bit different, but that’s ok! You may normally use salted butter, so feel free to mix some salt in to add a bit more flavor. Then start spreading!
The Science Behind Butter
We now know that when the fat in cream sticks together, it creates butter. So, why doesn’t the fat stick together all the time? Membranes! Small amounts of the fat cells in milk and cream are held together by a tight membrane, or “skin”, around the cell. When cream and milk are not being agitated, the membranes keep the fat cells from sticking together to form the blob.
However, when you shook the jar and agitated the cream, the fat cells bumped into each other, bursting the membranes! With no membranes keeping the fat cells separated, the cells then clump with each other to form the blob, which with further shaking, becomes the butter. Pretty cool!
Now to our second of our Thanksgiving-related STEM activities!
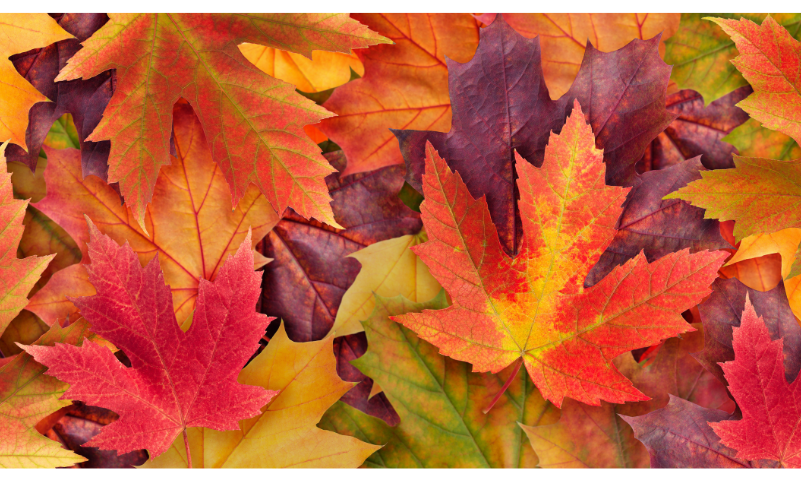
Leaf Chromatography
Ever wonder how many colors are hidden within a beautiful autumn leaf? Wonder no more! Leaf chromatography, perfect for tweens and older students, is a fun way to determine the colors in each leaf.
What You’ll Need
- Chromatography paper (pretty affordable on Amazon…if you don’t have time to get it, you can use coffee filters or paper towels)
- Rubbing alcohol
- Small mason jars or drinking glasses
- Clothespins or masking tape
- Pencils
- Scissors
- Fall leaves
- Mortar and pestle (optional)
- Large pot
Steps
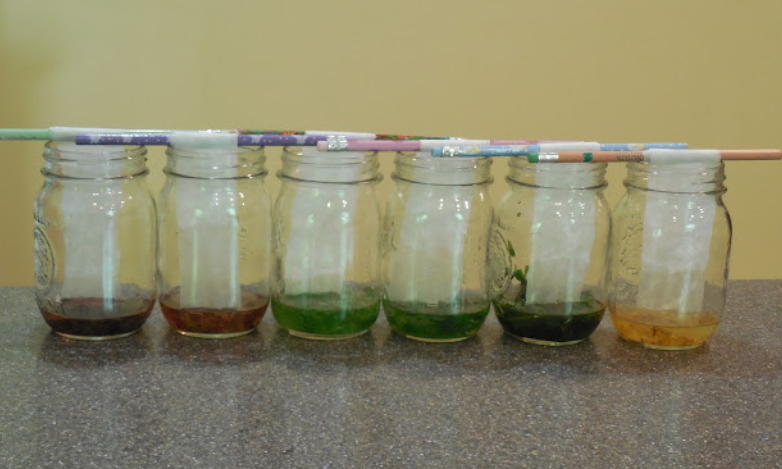
- Cut the leaves into small pieces and keep the leaves divided by their color. For example, if you use four mason jars or glasses, use one for a red leaf, one for a brown leaf, one for a yellow leaf, and one for a green leaf.
- After cutting the leaves, crush them into even smaller pieces with a spoon or a mortar and pestle. Put the crushed pieces, by color, into their own mason jar or glass.
- Pour rubbing alcohol onto the leaves, just until they’re covered. This won’t require much.
- Fill the large pot with a couple inches of water, place the jars in the pot, then heat the pot until the water begins to boil. After the water starts to boil, turn off the heat.
- Carefully remove the jars (they’ll be hot!) from the pot and place them in a dark area overnight.
- The next morning, take your jars out of the dark area.
- Cut the chromatography paper into strips that are only long enough to barely touch the alcohol when suspended.
- You’ll suspend the paper by wrapping one end around your pencil and securing the paper with a clothespin or masking tape. You can just rest the pencil sideways over the jar opening, so the bottom of the paper is just touching the alcohol.
9. Let the paper absorb the alcohol (this might take a couple of hours).
10. Once the alcohol makes its way to the top of the paper, remove the strips from the jars and lay them out to dry. If you don’t see much color at this point, don’t panic! Be patient.
11. As the paper dries, colors start to appear. Once completely dry, examine the paper to see the different colors that make up an autumn leaf that may only appear to be one color!
The Science Behind Leaf Colors
This cool experiment reveals the colorful pigments hidden within leaves. Many leaves in seasons besides fall simply look green, but that’s because of the chlorophyll, which helps plants absorb light. It’s also the main pigment used for photosynthesis, which harvests energy from sunlight. Because leaves have so much chlorophyll, it hides the other colors. But they’re in there!
In autumn, however, the chlorophyll breaks down and its nutrients are absorbed by the tree, leaving behind the other leaf pigments–the gorgeous red, orange, and yellow leaves many of us have the pleasure of seeing in the fall.
We hope you enjoyed Today’s Lesson and Thanksgiving-related STEM activities! Subscribe to our blog for more fun lesson ideas and creative homeschooling tips and tricks! And Happy Thanksgiving!